

bandit level 0-1#
For this section we are required to log in to the game through ssh, the syntax is as shown below
ssh bandit0@bandit.labs.overthewire.org -p 2220
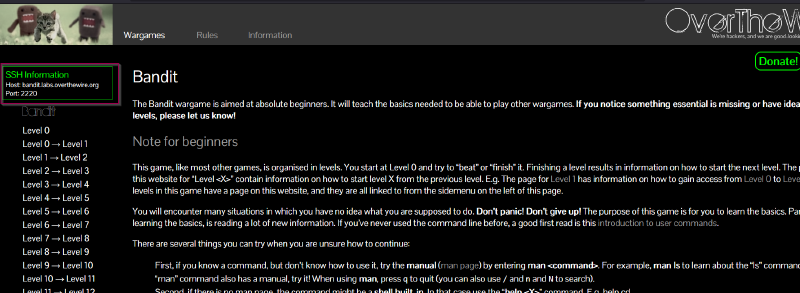
where the -p refers to port in which we are required to specify the port on which the ssh service is running on, as for our scenario, the ssh service is running on port 2220 as indicated in the webpage as shown below.
After logging in, we first list the contents of the current directory we are in using the ls command to see what we can find and then concatenate the file we find to see if we can find the password for the next level.
bandit0@bandit:~$ pwd
/home/bandit0
bandit0@bandit:~$ ls
readme
bandit0@bandit:~$ cat readme
Congratulations on your first steps into the bandit game!!
Please make sure you have read the rules at https://overthewire.org/rules/
If you are following a course, workshop, walkthrough or other educational activity,
please inform the instructor about the rules as well and encourage them to
contribute to the OverTheWire community so we can keep these games free!

The password you are looking for is: [Redacted]
as seen above we have found the password for the next level which we can use to log in to the next level via ssh.
bandit level 1-2#
In this section, the lesson we are required to learn, is how to read files with dashed file names.
After doing research online, the best way to read the contents of the file is by prefixing the path of the file as shown below.
bandit1@bandit:~$ cat ./-
[Redacted]
bandit1@bandit:~$
bandit level 2-3#
In this section, we are required to research online how to read files with spaces. After doing research online, we can read files with spaces in the following ways, as shown below.
bandit2@bandit:~$ ls
spaces in this filename
bandit2@bandit:~$ cat "spaces in this filename"
[Redacted]
bandit2@bandit:~$ cat spaces\ in\ this\ filename
[Redacted]
bandit2@bandit:~$
As seen above, we can read contents of a file with spaces by either enclosing the file in double quotes to be able to concatenate the file contents or by escaping the space characters with a backslash .
bandit level 3-4#
In this section we are required to know how to change directory location using the cd command and then how to list and open hidden files i a directory
bandit3@bandit:~/inhere$ cd ..
bandit3@bandit:~$ ls
inhere
bandit3@bandit:~$ cd inhere/
bandit3@bandit:~/inhere$ ls -a
.  ..  ...Hiding-From-You
bandit3@bandit:~/inhere$ cat ...Hiding-From-You
[REDACTED]
As seen above to list all the contetns of a directory, we use the command ls -a where the -a flag specifies that we lsit everything including hidden files as seen on the man page below.
LS(1)                                                            User Commands                                                            LS(1)

NAME
       ls - list directory contents

SYNOPSIS
       ls [OPTION]... [FILE]...

DESCRIPTION
       List  information  about  the  FILEs (the current directory by default).  Sort entries alphabetically if none of -cftuvSUX nor --sort is
       specified.

       Mandatory arguments to long options are mandatory for short options too.

       -a, --all
              do not ignore entries starting with .

       -A, --almost-all
              do not list implied . and ..
bandit level 4-5#
In this section, we are required to find a file that is human-readable, for this section we shall be using the command file to locate the file that is human-readable as shown below.
bandit4@bandit:~$ ls
inhere
bandit4@bandit:~$ cd inhere/
bandit4@bandit:~/inhere$ ls
-file00  -file01  -file02  -file03  -file04  -file05  -file06  -file07  -file08  -file09
bandit4@bandit:~/inhere$ file ./*
./-file00: PGP Secret Sub-key -
./-file01: data
./-file02: data
./-file03: data
./-file04: data
./-file05: data
./-file06: data
./-file07: ASCII text
./-file08: data
./-file09: data
bandit4@bandit:~/inhere$
As seen above, we have only one file with ASCII text that can be read by humans, -file07 . We can now concatenate the file to see the password for the next level
bandit4@bandit:~/inhere$ cat ./-file07
[REDACTED]
bandit level 5-6#
For this level, we are required to search for a file with the following characteristics using the find command.
human-readable
1033 bytes in size
not executable
Below is the command I used to find the file
bandit5@bandit:~/inhere$ ls
maybehere00  maybehere02  maybehere04  maybehere06  maybehere08  maybehere10  maybehere12  maybehere14  maybehere16  maybehere18
maybehere01  maybehere03  maybehere05  maybehere07  maybehere09  maybehere11  maybehere13  maybehere15  maybehere17  maybehere19
bandit5@bandit:~/inhere$ find -type f  -readable -size 1033c ! -executable
./maybehere07/.file2
bandit5@bandit:~/inhere$ cat ./maybehere07/.file2
[REDACTED]
Below is the breakdown of the command
 find -type f  -readable -size 1033c ! -executable

-type f – regular files only

-readable – file is readable by the current user

! -executable – not executable

-size 1033c – file size is exactly 1033 bytes (suffix c = bytes)
bandit level 6-7#
In this section, we are still required to look for a file with the following characteristics.
owned by user bandit7
owned by group bandit6
33 bytes in size
Below is the command we shall use and its breakdown too.
find / -type f -user bandit7 -group bandit6 -size 33c 2>/dev/null

/ — search from the root of the filesystem (you can change this if you know the likely directory)

-type f — regular files

-user bandit7 — file is owned by user bandit7

-group bandit6 — file is owned by group bandit6

-size 33c — file size is exactly 33 bytes

2>/dev/null — suppress permission denied errors
With that, we are able to find our file and its content as shown below.
bandit6@bandit:~$ find / -type f -user bandit7 -group bandit6 -size 33c 2>/dev/null
/var/lib/dpkg/info/bandit7.password
bandit6@bandit:~$ cat /var/lib/dpkg/info/bandit7.password
[REDACTED]
bandit level 7-8#
In this section, we are required to utilize the grep command in order to be able to find the password for the next level in a file stored next to the word millionth.
We can achieve this in two ways, as shown below.
bandit7@bandit:~$ ls
data.txt
bandit7@bandit:~$ cat data.txt | grep -ie millionth
millionth       [REDACTED]
bandit7@bandit:~$ grep -ie millionth data.txt
millionth       [REDACTED]
bandit7@bandit:~$
Below is the breakdown of the commands used above.
cat data.txt | grep -ie millionth

This command outputs the contents of the file data.txt.

| (pipe)

The pipe takes the output of the cat command and sends it as input to the next command (grep).

grep -ie millionth

grep is used to search for lines that match a pattern.

-i makes the search case-insensitive (Millionth, millionth, MILLIONTH, etc., will all match).

-e allows you to specify the pattern explicitly (millionth in this case).

grep -ie millionth data.txt

grep -ie millionth

grep is used to search for lines that match a pattern.

-i makes the search case-insensitive (Millionth, millionth, MILLIONTH, etc., will all match).

-e allows you to specify the pattern explicitly (millionth in this case).

 data.txt specifies the file on to which we are required to look for the pattern we want.
bandit level 8-9#
In this section, we are required to look for the password in the file for the next level in the data.txt file, and it occurs only once. Below is the command I used to look for the password.
bandit8@bandit:~$ ls
data.txt
bandit8@bandit:~$ sort data.txt | uniq -c | grep " 1 "
[REDACTED]
Below is a breakdown of the command.
sort data.txt

Sorts all lines alphabetically so duplicates are adjacent.

uniq -c

Counts the number of occurrences of each unique line.

grep " 1 "

Filters to show only lines that appear once.
bandit level 9-10#
In this section, we are required to look for a string that is the password for the next level with the following characteristics.
The password for the next level is stored in the file data.txt
in one of the few human-readable strings, preceded by several ‘=’
characters.
Below is the command I used to find the password
bandit9@bandit:~$ strings data.txt | grep  "=.*"
,k=?
@k*=
========== the
#e=in
g+=ypF
ea=+
K>=*<
========== password{k
=========== is
1R=j/
e=<2g%
+G/YD=
=wDk
=3?lOt
[REDACTED]
=D!f
H =sS
Here is the breakdown of the command.
strings data.txt

Extracts human-readable strings from a binary file.

grep '=.*'

Filters lines that contain one or more = characters followed by other text (the likely format for the password).
bandit level 10-11#
In this section, the password is base64 encoded, we are required to decrypt the base64 encoding to find the password for the next level.
bandit10@bandit:~$ ls
data.txt
bandit10@bandit:~$ cat data.txt | base64 -d
[REDACTED]
bandit10@bandit:~$
Below is a breakdown of the command used.
cat data.txt

This reads and prints the contents of the file data.txt to standard output.

| (pipe)

Takes the output of cat data.txt and passes it as input to the next command.

base64 -d

This decodes base64-encoded data.

-d stands for decode (same as --decode).
bandit level 11-12#
For this section, our password is encoded using rot13, we are required to find it in the data.txt file. Below is the command we shall use to find the password for the next level, as shown below.
bandit11@bandit:~$ cat data.txt | tr 'A-Za-z' 'N-ZA-Mn-za-m'
The password is [REDACTED]
Below is the breakdown of the command
tr = translate characters.

'A-Za-z' – the full alphabet (uppercase and lowercase).

'N-ZA-Mn-za-m' – the ROT13-shifted version.

This command replaces each letter with the one 13 positions later.
bandit level 12-13#
In this section, our password is stored in a file data.txt, however the contents of this file are required to be converted to a binary which is compressed several times and we are required to decompress it until we find the password for the next level.
Below is how I solved the problem
bandit12@bandit:~$ ls
data.txt
bandit12@bandit:~$ file data.txt
data.txt: ASCII text
bandit12@bandit:~$ cd /tmp
bandit12@bandit:/tmp$ mkdir n00b
bandit12@bandit:/tmp$ cd n00b
bandit12@bandit:/tmp/n00b$ cp /home/bandit12/data.txt .
bandit12@bandit:/tmp/n00b$ xxd -r data.txt > data.bin
bandit12@bandit:/tmp/n00b$ file data.bin
data.bin: gzip compressed data, was "data2.bin", last modified: Thu Apr 10 14:22:57 2025, max compression, from Unix, original size modulo 2^32 585
bandit12@bandit:/tmp/n00b$ mv data data.gz
bandit12@bandit:/tmp/n00b$ gunzip data.gz
bandit12@bandit:/tmp/n00b$ file data
data: POSIX tar archive (GNU)
bandit12@bandit:/tmp/n00b$ mv data data.tar
bandit12@bandit:/tmp/n00b$ tar -xf data.tar
bandit12@bandit:/tmp/n00b$ file data
data: cannot open `data' (No such file or directory)
bandit12@bandit:/tmp/n00b$ ls
data5.bin  data.tar  data.txt
bandit12@bandit:/tmp/n00b$ file data5.bin
data5.bin: POSIX tar archive (GNU)
bandit12@bandit:/tmp/n00b$ mv data5.bin data.tar
bandit12@bandit:/tmp/n00b$ tar -xf data.tar
bandit12@bandit:/tmp/n00b$ file data
data: cannot open `data' (No such file or directory)
bandit12@bandit:/tmp/n00b$ ls
data6.bin  data.tar  data.txt
bandit12@bandit:/tmp/n00b$ file data6.bin
data6.bin: bzip2 compressed data, block size = 900k
bandit12@bandit:/tmp/n00b$ mv data6.bin data.bz2
bandit12@bandit:/tmp/n00b$ bunzip2 data.bz2
bandit12@bandit:/tmp/n00b$ file data
data: POSIX tar archive (GNU)
bandit12@bandit:/tmp/n00b$ mv data data.tar
bandit12@bandit:/tmp/n00b$ tar -xf data.tar
bandit12@bandit:/tmp/n00b$ file data
data: cannot open `data' (No such file or directory)
bandit12@bandit:/tmp/n00b$ ls
data8.bin  data.tar  data.txt
bandit12@bandit:/tmp/n00b$ file data8.bin
data8.bin: gzip compressed data, was "data9.bin", last modified: Thu Apr 10 14:22:57 2025, max compression, from Unix, original size modulo 2^32 49
bandit12@bandit:/tmp/n00b$ mv data8.bin data.gz
bandit12@bandit:/tmp/n00b$ gunzip data.gz
bandit12@bandit:/tmp/n00b$ ls
data  data.tar  data.txt
bandit12@bandit:/tmp/n00b$ file data
data: ASCII text
bandit12@bandit:/tmp/n00b$ cat data
The password is [REDACTED]
Below is a breakdown of what is happening
Step-by-step breakdown:
lsandfile data.txt
bandit12@bandit:~$ ls
data.txt

bandit12@bandit:~$ file data.txt
data.txt: ASCII text
- You list the file, confirm
data.txtexists. file data.txtshows it’s ASCII text — consistent with a hexdump (textual hex representation of binary data).
- Create and move to a working directory
bandit12@bandit:/tmp$ mkdir n00b
bandit12@bandit:/tmp$ cd n00b
- Creates a safe workspace
/tmp/n00bto avoid clutter and permission issues.
- Copy
data.txtto working dir
bandit12@bandit:/tmp/n00b$ cp /home/bandit12/data.txt .
- Copy the hexdump file here to work on it.
- Reverse the hexdump back to binary
bandit12@bandit:/tmp/n00b$ xxd -r data.txt > data.bin
xxd -rconverts the hexdump text indata.txtback into the original binary filedata.bin.
- Check what
data.binis
bandit12@bandit:/tmp/n00b$ file data.bin
data.bin: gzip compressed data, was "data2.bin", last modified: ..., original size 585
fileidentifiesdata.binas a gzip compressed file.
- Rename and decompress gzip file
bandit12@bandit:/tmp/n00b$ mv data data.gz
bandit12@bandit:/tmp/n00b$ gunzip data.gz
- Rename (the command here says
mv data data.gz, but likely it should bemv data.bin data.gz). - Then decompress with
gunzip, producing a file nameddata.
- Check what
datais
bandit12@bandit:/tmp/n00b$ file data
data: POSIX tar archive (GNU)
- The file is now a tar archive.
- Rename and extract the tar archive
bandit12@bandit:/tmp/n00b$ mv data data.tar
bandit12@bandit:/tmp/n00b$ tar -xf data.tar
- Renamed
datatodata.tar. - Extracted contents with
tar -xf data.tar.
- Check the extracted files
bandit12@bandit:/tmp/n00b$ ls
data5.bin  data.tar  data.txt
- Extraction created
data5.bin.
- Check
data5.binfile type
bandit12@bandit:/tmp/n00b$ file data5.bin
data5.bin: POSIX tar archive (GNU)
data5.binis another tar archive.
- Rename and extract again
bandit12@bandit:/tmp/n00b$ mv data5.bin data.tar
bandit12@bandit:/tmp/n00b$ tar -xf data.tar
- Rename
data5.bintodata.tarand extract.
- Check extracted files again
bandit12@bandit:/tmp/n00b$ ls
data6.bin  data.tar  data.txt
- New file
data6.binappears.
- Check
data6.binfile type
bandit12@bandit:/tmp/n00b$ file data6.bin
data6.bin: bzip2 compressed data, block size = 900k
data6.binis a bzip2 compressed file.
- Rename and decompress bzip2 file
bandit12@bandit:/tmp/n00b$ mv data6.bin data.bz2
bandit12@bandit:/tmp/n00b$ bunzip2 data.bz2
- Rename to
.bz2extension, decompress usingbunzip2. - Decompression produces
data.
- Check new
datafile type
bandit12@bandit:/tmp/n00b$ file data
data: POSIX tar archive (GNU)
- It’s another tar archive.
- Rename and extract tar archive again
bandit12@bandit:/tmp/n00b$ mv data data.tar
bandit12@bandit:/tmp/n00b$ tar -xf data.tar
- Check contents again
bandit12@bandit:/tmp/n00b$ ls
data8.bin  data.tar  data.txt
- New file
data8.bin.
- Check
data8.bintype
bandit12@bandit:/tmp/n00b$ file data8.bin
data8.bin: gzip compressed data, was "data9.bin", last modified: ..., original size 49
data8.binis gzip compressed data again.
- Rename and decompress gzip again
bandit12@bandit:/tmp/n00b$ mv data8.bin data.gz
bandit12@bandit:/tmp/n00b$ gunzip data.gz
- List files and check final file
bandit12@bandit:/tmp/n00b$ ls
data  data.tar  data.txt

bandit12@bandit:/tmp/n00b$ file data
data: ASCII text
- Finally, the decompressed
datafile is ASCII text — likely the password.
- Display the password
bandit12@bandit:/tmp/n00b$ cat data
The password is [REDACTED]
To simplify, we can automate by using a bash script as below.
#!/bin/bash
set -euo pipefail

# Check for required commands
for cmd in file xxd gunzip bunzip2 tar xzcat xz; do
  if ! command -v "$cmd" &>/dev/null; then
    echo "Error: required command '$cmd' not found."
    exit 1
  fi
done

WORKDIR=$(pwd)
filename="data.bin"

function cleanup {
  # Optional: cleanup temporary files if needed
  :
}
trap cleanup EXIT

while true; do
  if [[ ! -f "$filename" ]]; then
    echo "Error: file '$filename' not found."
    exit 1
  fi

  filetype=$(file -b "$filename")
  echo "[*] Current file ($filename) type: $filetype"

  case "$filetype" in

    *"gzip compressed data"*)
      newfile="data_$(date +%s).gz"
      mv "$filename" "$newfile"
      echo "[*] Decompressing gzip: $newfile"
      gunzip "$newfile"
      filename="${newfile%.gz}"
      ;;

    *"bzip2 compressed data"*)
      newfile="data_$(date +%s).bz2"
      mv "$filename" "$newfile"
      echo "[*] Decompressing bzip2: $newfile"
      bunzip2 "$newfile"
      filename="${newfile%.bz2}"
      ;;

    *"XZ compressed data"*)
      newfile="data_$(date +%s).xz"
      mv "$filename" "$newfile"
      echo "[*] Decompressing xz: $newfile"
      unxz "$newfile"
      filename="${newfile%.xz}"
      ;;

    *"POSIX tar archive"*)
      newfile="data_$(date +%s).tar"
      mv "$filename" "$newfile"
      echo "[*] Extracting tar archive: $newfile"
      mkdir -p extracted_$newfile
      tar -xf "$newfile" -C extracted_$newfile
      # Find biggest file in extracted directory
      nextfile=$(find extracted_$newfile -type f -exec ls -s {} + | sort -nr | head -n1 | awk '{print $2}')
      if [[ -z "$nextfile" ]]; then
        echo "[!] No files found inside the archive."
        exit 1
      fi
      filename="$nextfile"
      cd "$WORKDIR"  # make sure we stay in same dir
      echo "[*] Next file to process: $filename"
      ;;

    *"ASCII text"*)
      echo "[*] Found ASCII text file. Contents:"
      echo "---------------------------------------------------"
      cat "$filename"
      echo "---------------------------------------------------"
      echo "[*] Done."
      break
      ;;

    *)
      echo "[!] Unsupported or unknown file type: $filetype"
      echo "[!] Exiting."
      exit 1
      ;;
  esac
done
Breakdown of the script.
🔧 Header and Safety Settings
#!/bin/bash
set -euo pipefail
#!/bin/bash: Specifies that the script should be run using Bash.set -euo pipefail: Enables strict error handling:e: Exit immediately if any command fails.u: Treat unset variables as errors.o pipefail: Ensures that failures in pipelines are caught.
🔍 Check for Required Tools
for cmd in file xxd gunzip bunzip2 tar xzcat xz; do
  if ! command -v "$cmd" &>/dev/null; then
    echo "Error: required command '$cmd' not found."
    exit 1
  fi
done
- Loops through a list of required tools.
- Exits early with a clear error if any command is missing.
🗂️ Setup Working Variables and Cleanup
WORKDIR=$(pwd)
filename="data.bin"
WORKDIR: Stores the current directory path.filename: The main input file that will be processed repeatedly.
function cleanup {
  :
}
trap cleanup EXIT
- Placeholder cleanup function.
trap cleanup EXIT: Callscleanupwhen the script exits (could be used to remove temporary files).
🔁 Main Processing Loop
while true; do
This is an infinite loop that keeps processing the file data.bin (and its descendants) until the script identifies an ASCII text file (likely the final password).
📂 Check File and Detect Type
if [[ ! -f "$filename" ]]; then
  echo "Error: file '$filename' not found."
  exit 1
fi

filetype=$(file -b "$filename")
echo "[*] Current file ($filename) type: $filetype"
- Ensures the file exists.
- Uses the
filecommand to detect the file type (e.g., gzip, tar, ASCII text).
📦 Handle Each Compression Type
- Gzip
*"gzip compressed data"*)
  ...
- Renames
data.binto something likedata_1717512345.gz(timestamped). - Unzips it using
gunzip. - Updates
filenameto the result.
- Bzip2
*"bzip2 compressed data"*)
  ...
- Same logic as gzip but with
.bz2andbunzip2.
- XZ Compression
*"XZ compressed data"*)
  ...
- Handles
.xzcompressed files usingunxz.
- Tar Archive
*"POSIX tar archive"*)
  ...
- Detects tar archive.
- Moves it to a timestamped
.tarfile. - Extracts contents into a new folder (
extracted_<filename>). - Finds the largest extracted file (likely the next compression layer).
- Sets that as the new
filename.
- ASCII Text File (End Goal)
*"ASCII text"*)
  ...
- When a plain text file is finally detected:
- Displays the file content (usually the password).
- Exits the loop and the script.
❌ Fallback for Unknown File Types
*)
  echo "[!] Unsupported or unknown file type: $filetype"
  exit 1
  ;;
- Catches all other file types not handled explicitly and exits.
The script is to be copied in the temporary directory where the binary file is stored then executed from there.
To make the file executable you save as chmod +x <name>.sh
bandit level 13-14#
In this level, we are provided with a private ssh key that we are required to use to log in to the use bandit14 from our ssh session of bandit13 in order to be able to read the password for user bandit14 that is stored on the location /etc/bandit_pass/bandit14.
Below is the command we use to log in to bandit14 from our server as shown below.
bandit13@bandit:~$ ssh -i sshkey.private bandit14@localhost -p 2220

ssh - Starts the Secure Shell (SSH) client. Used to connect to remote servers.

-i sshkey.private
Tells SSH to use the identity file (private key) sshkey.private for authentication. This file was provided in the level.

bandit14@localhost
Specifies the user (bandit14) and host (localhost) to connect to. localhost means "this machine" (i.e., you're logging into the same server you're already on, but as a different user).

-p 2220
Instructs SSH to connect using port 2220 instead of the default port 22. This is important for Bandit, since all levels use port 2220.
With that, we are now logged in to bandit14 user, and we can now get the password for the user stored in the location /etc/badnit_pass/bandit14
bandit level 14-15#
In this level we are required to submit the password for user badnit14 to localhost on port3000 in order to find the password for the next level that is abndit15.
Below is the command we shall use to submit the password and get the password for bandit15
bandit14@bandit:~$ cat /etc/bandit_pass/bandit14 | nc localhost 30000
Correct!
[REDACTED]

cat /etc/bandit_pass/bandit14 reads your current level's password.

| pipes it as input into…

nc localhost 30000 which sends it to port 30000 on the local machine.
bandit level 15-16#
In this level, we are required to submit the password for the current level using SSL encryption on port 30001 in order to get the password for the next level bandit16. Below is the command we shall use to get the password.
bandit15@bandit:~$ cat /etc/bandit_pass/bandit15 | ncat --ssl localhost 30001
Correct!
[REDACTED]

 cat /etc/bandit_pass/bandit15

Purpose: Reads the contents of the file that holds the current level's password (for bandit15).

This password is needed to authenticate and retrieve the next level’s password.

 |

The pipe (|) takes the output of the cat command (the password) and sends it as input to the next command (ncat).

 ncat --ssl localhost 30001

ncat: A modern version of netcat (from the Nmap project). It allows data to be sent or received over the network.

--ssl: Enables SSL/TLS encryption for secure communication.

localhost: Refers to the current machine (i.e., you're connecting to a service running locally).

30001: The port number on localhost that is listening for incoming SSL connections.
bandit level 16-17#
For this section, we are required to do the same steps as the initial level, however, we are required to first scan for open ports that has the server running.
bandit16@bandit:~$ nmap localhost -p 31000-32000
Starting Nmap 7.94SVN ( https://nmap.org ) at 2025-06-04 08:44 UTC
Nmap scan report for localhost (127.0.0.1)
Host is up (0.00018s latency).
Not shown: 996 closed tcp ports (conn-refused)
PORT      STATE SERVICE
31046/tcp open  unknown
31518/tcp open  unknown
31691/tcp open  unknown
31790/tcp open  unknown
31960/tcp open  unknown

Nmap done: 1 IP address (1 host up) scanned in 0.09 seconds
As seen above we have few ports running, however to get more accurate details, we shall try to do an aggressive scan -A to get more clear details as shown below.
bandit16@bandit:~$ nmap localhost -A -p 31000-32000
Starting Nmap 7.94SVN ( https://nmap.org ) at 2025-06-04 08:48 UTC
Nmap scan report for localhost (127.0.0.1)
Host is up (0.00011s latency).
Not shown: 996 closed tcp ports (conn-refused)
PORT      STATE SERVICE     VERSION
31046/tcp open  echo
31518/tcp open  ssl/echo
|_ssl-date: TLS randomness does not represent time
| ssl-cert: Subject: commonName=SnakeOil
| Not valid before: 2024-06-10T03:59:50
|_Not valid after:  2034-06-08T03:59:50
31691/tcp open  echo
31790/tcp open  ssl/unknown
| ssl-cert: Subject: commonName=SnakeOil
| Not valid before: 2024-06-10T03:59:50
|_Not valid after:  2034-06-08T03:59:50
|_ssl-date: TLS randomness does not represent time
| fingerprint-strings:
|   FourOhFourRequest, GenericLines, GetRequest, HTTPOptions, Help, LPDString, RTSPRequest, SIPOptions:
|_    Wrong! Please enter the correct current password.
31960/tcp open  echo
1 service unrecognized despite returning data. If you know the service/version, please submit the following fingerprint at https://nmap.org/cgi-bin/submit.cgi?new-service :
SF-Port31790-TCP:V=7.94SVN%T=SSL%I=7%D=6/4%Time=68400869%P=x86_64-pc-linux
SF:-gnu%r(GenericLines,32,"Wrong!\x20Please\x20enter\x20the\x20correct\x20
SF:current\x20password\.\n")%r(GetRequest,32,"Wrong!\x20Please\x20enter\x2
SF:0the\x20correct\x20current\x20password\.\n")%r(HTTPOptions,32,"Wrong!\x
SF:20Please\x20enter\x20the\x20correct\x20current\x20password\.\n")%r(RTSP
SF:Request,32,"Wrong!\x20Please\x20enter\x20the\x20correct\x20current\x20p
SF:assword\.\n")%r(Help,32,"Wrong!\x20Please\x20enter\x20the\x20correct\x2
SF:0current\x20password\.\n")%r(FourOhFourRequest,32,"Wrong!\x20Please\x20
SF:enter\x20the\x20correct\x20current\x20password\.\n")%r(LPDString,32,"Wr
SF:ong!\x20Please\x20enter\x20the\x20correct\x20current\x20password\.\n")%
SF:r(SIPOptions,32,"Wrong!\x20Please\x20enter\x20the\x20correct\x20current
SF:\x20password\.\n");

Service detection performed. Please report any incorrect results at https://nmap.org/submit/ .
Nmap done: 1 IP address (1 host up) scanned in 161.57 seconds
Now we have more details, we have SSL service running on port 31790, when we pass the creds for bandit16 to this service, we are provided with a private ssh key as shown below.
bandit16@bandit:~$ cat /etc/bandit_pass/bandit16 | ncat --ssl localhost 31790
Correct!
-----BEGIN RSA PRIVATE KEY-----
[REDACTED]
-----END RSA PRIVATE KEY-----
We can use this key to log in to bandit level 17 in our local machine but first we are required to change the file permission as shown below.
chmod 400 key

where
4 = owner can read
0 = group has no permission
0 = others have no permission
Then we can log in to level 17 by using the commands below.
ssh -i key bandit17@bandit.labs.overthewire.org -p 2220
With that, we then access the password for bandit 17 at /etc/bandit_pass/badnit17
bandit level 17-18#
For this section, we are required to use the command diff in order to find the string that is different in order to find the password for level 18. Below is the command used to check the difference.
bandit17@bandit:~$ diff passwords.old passwords.new
42c42
< [REDACTED]
---
> [REDACTED]

breakdown

diff: A Linux command that compares files and outputs the lines that differ.

passwords.old: The first file, presumably containing older password data.

passwords.new: The second file, presumably containing updated password data.
bandit level 18-19#
For this section we are required to log in as user bandit18, however the .bashrc has been modified in such a manner that we get logged out when we try to log in as user bandit18 using ssh as shown below.

Looking at the man pages for ssh, we can use the -t flag that will allow us to set a terminal that we can use to get the password for level 19 as shown below.
       -t      Force pseudo-terminal allocation.  This can be used to execute arbitrary screen-based programs on  a  remote  ma‐
               chine, which can be very useful, e.g. when implementing menu services.  Multiple -t options force tty allocation,
               even if ssh has no local tty.
To log in to the level 18 we shall use the following command
ssh -t bandit18@bandit.labs.overthewire.org -p 2220 /bin/sh

breakdown

ssh: This is the Secure Shell command, used to remotely log into another machine over the network.

-t: This forces pseudo-terminal allocation. It allows you to run commands that require a terminal (like interactive shells). Even if a command is given directly (like /bin/sh), -t ensures it gets a proper terminal session.

bandit18@bandit.labs.overthewire.org:

bandit18 — the username you're logging in with.

bandit.labs.overthewire.org — the host/domain of the remote server.

-p 2220: Specifies the port number for SSH, which is 2220 (instead of the default 22).

/bin/sh: This is the command to run once you're logged in — it directly invokes the sh shell on the remote system.
After getting access as user bandit18, we can now be able to access the password stored on the file readme
bandit level 19-20#
For this section, we are required to use the binary bandit20-do to get the password for the next level, but first we shall execute it without any arguments to see the syntax to execute the binary with commands as shown below.
bandit19@bandit:~$ ls
bandit20-do
bandit19@bandit:~$ ./bandit20-do
Run a command as another user.
  Example: ./bandit20-do id
bandit19@bandit:~$
As seen above we can be able to execute the binary with commands following it as shown below, however, our password for user bandit20 is located at /etc/bandit_pass/bandit20
bandit19@bandit:~$ ./bandit20-do cat /etc/bandit_pass/bandit20
[READCTED]
bandit19@bandit:~$
bandit level 20-21#
For this section, we shall use two terminals for us to be able to get the password for the next level. The first terminal we shall pass the password for bandit20 on a certain port and then listen on the port using the binary on another terminal as shown below.
#Terminal 1 pass the password for bandit20 through port <port of your choice>

bandit20@bandit:~$ nc -lp 31337 < /etc/bandit_pass/bandit20
[next level password as output]

#Terminal 2 listen on the port where th epassword has been passed from

bandit20@bandit:~$ ./suconnect 31337
Read: [Initial password level passed and read]
Password matches, sending next password
bandit level 21-22#
For this section, we are told a program is running automatically at regular intervals from cron, the time-based job scheduler. Look in /etc/cron.d/ for the configuration and see what command is being executed.
We can check to know what command is executed as shown below.
bandit21@bandit:~$ ls -la /etc/cron.d
total 48
drwxr-xr-x   2 root root  4096 Apr 10 14:24 .
drwxr-xr-x 121 root root 12288 Apr 21 12:42 ..
-rw-r--r--   1 root root   123 Apr 10 14:16 clean_tmp
-rw-r--r--   1 root root   120 Apr 10 14:23 cronjob_bandit22
-rw-r--r--   1 root root   122 Apr 10 14:23 cronjob_bandit23
-rw-r--r--   1 root root   120 Apr 10 14:23 cronjob_bandit24
-rw-r--r--   1 root root   201 Apr  8  2024 e2scrub_all
-rwx------   1 root root    52 Apr 10 14:24 otw-tmp-dir
-rw-r--r--   1 root root   102 Mar 31  2024 .placeholder
-rw-r--r--   1 root root   396 Jan  9  2024 sysstat
bandit21@bandit:~$ cat /etc/cron.d/cronjob_bandit22
@reboot bandit22 /usr/bin/cronjob_bandit22.sh &> /dev/null
* * * * * bandit22 /usr/bin/cronjob_bandit22.sh &> /dev/null
bandit21@bandit:~$ cat /usr/bin/cronjob_bandit22.sh
#!/bin/bash
chmod 644 /tmp/t7O6lds9S0RqQh9aMcz6ShpAoZKF7fgv
cat /etc/bandit_pass/bandit22 > /tmp/t7O6lds9S0RqQh9aMcz6ShpAoZKF7fgv
bandit21@bandit:~$ cat /tmp/t7O6lds9S0RqQh9aMcz6ShpAoZKF7fgv
[REDACTED]
As seen above, the command that is executed is as explained below.
#!/bin/bash
chmod 644 /tmp/t7O6lds9S0RqQh9aMcz6ShpAoZKF7fgv
cat /etc/bandit_pass/bandit22 > /tmp/t7O6lds9S0RqQh9aMcz6ShpAoZKF7fgv
#!/bin/bash

Breakdown

This is a shebang line.

It tells the system to execute the script using the Bash shell (/bin/bash).

chmod 644 /tmp/t7O6lds9S0RqQh9aMcz6ShpAoZKF7fgv

chmod 644 sets the file permissions on the given file.

6 = read + write for owner

4 = read-only for group

4 = read-only for others

So, the file becomes world-readable, which means any user on the system can read it.

cat /etc/bandit_pass/bandit22 > /tmp/t7O6lds9S0RqQh9aMcz6ShpAoZKF7fgv

This uses cat to read the contents of the password file for bandit22.

The output is redirected (>) into the temporary file /tmp/t7O6lds9S0RqQh9aMcz6ShpAoZKF7fgv.
bandit level 22-23#
This section is the same as the previous one, where we are required to look at the cronjob and see what command is being executed. Furthermore, for this section there is no command but a bash script as shown below.
bandit22@bandit:~$ ls -la /etc/cron.d
total 48
drwxr-xr-x   2 root root  4096 Apr 10 14:24 .
drwxr-xr-x 121 root root 12288 Apr 21 12:42 ..
-rw-r--r--   1 root root   123 Apr 10 14:16 clean_tmp
-rw-r--r--   1 root root   120 Apr 10 14:23 cronjob_bandit22
-rw-r--r--   1 root root   122 Apr 10 14:23 cronjob_bandit23
-rw-r--r--   1 root root   120 Apr 10 14:23 cronjob_bandit24
-rw-r--r--   1 root root   201 Apr  8  2024 e2scrub_all
-rwx------   1 root root    52 Apr 10 14:24 otw-tmp-dir
-rw-r--r--   1 root root   102 Mar 31  2024 .placeholder
-rw-r--r--   1 root root   396 Jan  9  2024 sysstat
bandit22@bandit:~$ cat /etc/cron.d/cronjob_bandit23
@reboot bandit23 /usr/bin/cronjob_bandit23.sh  &> /dev/null
* * * * * bandit23 /usr/bin/cronjob_bandit23.sh  &> /dev/null
bandit22@bandit:~$ cat /usr/bin/cronjob_bandit23.sh
#!/bin/bash

myname=$(whoami)
mytarget=$(echo I am user $myname | md5sum | cut -d ' ' -f 1)

echo "Copying passwordfile /etc/bandit_pass/$myname to /tmp/$mytarget"

cat /etc/bandit_pass/$myname > /tmp/$mytarget
Below is a breakdown of what the script is doing
#!/bin/bash

myname=$(whoami)
mytarget=$(echo I am user $myname | md5sum | cut -d ' ' -f 1)

echo "Copying passwordfile /etc/bandit_pass/$myname to /tmp/$mytarget"

cat /etc/bandit_pass/$myname > /tmp/$mytarget

Breakdown

🔍 Line-by-Line Explanation
#!/bin/bash

The shebang line — tells the system to use the Bash shell to interpret the script.

myname=$(whoami)

Runs the whoami command to get the current username, and saves it in the variable myname.

mytarget=$(echo I am user $myname | md5sum | cut -d ' ' -f 1)

This line creates a hashed target filename:

echo I am user $myname: creates the string I am user banditXX (if you're bandit20, it'll say I am user bandit20)

| md5sum: pipes that string into md5sum, producing a hash

| cut -d ' ' -f 1: trims the output to only the hash (since md5sum outputs both the hash and a dash -)

Result: You now have a unique hash value stored in mytarget, which will be used as a filename.

echo "Copying passwordfile /etc/bandit_pass/$myname to /tmp/$mytarget"

Just prints a message like: Copying passwordfile /etc/bandit_pass/bandit20 to /tmp/94f93cbfe0e106a7e6bffa548f2d8a4d

cat /etc/bandit_pass/$myname > /tmp/$mytarget

Uses cat to read the contents of the password file for the current user (/etc/bandit_pass/bandit20 if you're bandit20).

Redirects (>) that output to the /tmp folder under the hashed filename.
With that, we can simply get the password by doing the following.
bandit22@bandit:~$ echo "I am user bandit23" | md5sum
8ca319486bfbbc3663ea0fbe81326349  -
bandit22@bandit:~$ cat /tmp/8ca319486bfbbc3663ea0fbe81326349
[REDACTED]
What we have simply done is echo I am user bandit23 and hashed it using md5sum, then concatenated the contents of the password stored in the tmp directory with md5 hash value.
bandit level 23-24#
This level is similar to the previous one, however the script executed is different this time, as seen below.
bandit23@bandit:~$ cat /usr/bin/cronjob_bandit24.sh
#!/bin/bash

myname=$(whoami)

cd /var/spool/$myname/foo
echo "Executing and deleting all scripts in /var/spool/$myname/foo:"
for i in * .*;
do
    if [ "$i" != "." -a "$i" != ".." ];
    then
        echo "Handling $i"
        owner="$(stat --format "%U" ./$i)"
        if [ "${owner}" = "bandit23" ]; then
            timeout -s 9 60 ./$i
        fi
        rm -f ./$i
    fi
done
Below is a break-down of the script
This Bash script is designed to execute and delete all scripts in a directory, with some checks for file ownership and a timeout. It’s likely part of a challenge like Bandit Level 24 → 25, where your script is automatically executed if you drop it in the right place with the right ownership.

🔍 Full Breakdown
#!/bin/bash

The shebang tells the system to use Bash to run the script.

myname=$(whoami)

Stores the current username in the variable myname.

cd /var/spool/$myname/foo

Changes the current working directory to /var/spool/<username>/foo.

For example, if whoami is bandit24, this becomes /var/spool/bandit24/foo.

echo "Executing and deleting all scripts in /var/spool/$myname/foo:"

Just a status message to indicate what the script is doing.

🔁 Loop
for i in * .*;

Iterates over all files, including hidden ones (.*).

Typical globbing (*) misses dotfiles (like .my_script), so both patterns are used to catch everything.

if [ "$i" != "." -a "$i" != ".." ];

Skips the special entries . (current directory) and .. (parent directory), which would break the script if processed.

echo "Handling $i"

Prints the filename being processed.

owner="$(stat --format "%U" ./$i)"

Uses stat to get the owner of the file (%U is the user name), and stores it in owner.

if [ "${owner}" = "bandit23" ]; then
    timeout -s 9 60 ./$i
fi

If the file is owned by bandit23, the script:

Runs the file using timeout:

-s 9: sends SIGKILL (signal 9) if it runs too long.

60: gives it 60 seconds max to run.

Prevents scripts from hanging or consuming too many resources.

rm -f ./$i

Deletes the script file after executing (regardless of ownership or execution success).
So this requires us to create our own shell script to pass this level, however we shall use some trick, we will create the variable myname and assign the value bandit24 as shown below.
bandit23@bandit:~$ myname=bandit24
bandit23@bandit:~$ $myname
bandit24: command not found
bandit23@bandit:~$
After creating the variable we shall then create a tmp adirectory where the password will be stored for us to be able to reach it by setting the directory permissions for everyone to be able to read, write and execute it as shown below
bandit23@bandit:~$ mkdir /tmp/victor
bandit23@bandit:~$ chmod 777 /tmp/victor
bandit23@bandit:~$
After that we shall then switch to the spool directory of bandit user bandit24 using the variable we created as shown below.
bandit23@bandit:~$ cd /var/spool/$myname
bandit23@bandit:/var/spool/bandit24$ ls
foo
bandit23@bandit:/var/spool/bandit24$ cd foo
bandit23@bandit:/var/spool/bandit24/foo$
After that we create our script inside here and change its permissions to an executable in order for us to get the password stored in our temporary directory. The contents of our script will be as follows
#!/usr/bin/bash

cat /etc/bandit_pass/bandit24 > /tmp/victor/pass.txt
Below is the file setup.
bandit23@bandit:/var/spool/bandit24/foo$ nano get.sh
Unable to create directory /home/bandit23/.local/share/nano/: No such file or directory
It is required for saving/loading search history or cursor positions.

bandit23@bandit:/var/spool/bandit24/foo$ chmod +x get.sh
bandit23@bandit:/var/spool/bandit24/foo$
We then wait for a minute, then see what is stored in our temporary directory.
bandit23@bandit:/var/spool/bandit24/foo$ ls /tmp/victor
pass.txt
bandit23@bandit:/var/spool/bandit24/foo$ cat /tmp/victor/pass.txt
[REDACTED]
We now have the password for the next level.
bandit level 24-25#
From the description of the challenge, it seems we shall be creating a simple bash script that will loop through a 10000 4-pin digit in combination with the bandit24 pass in order to get the password for the next level.
Below is the script to our problem.
#!/usr/bin/env bash
# Shebang line tells the system to use the Bash shell via the env command (more portable than /bin/bash)

# Loop through numbers 0000 to 9999 (4-digit PINs, zero-padded)
for i in $(seq -w 0 9999); do #The seq command in Linux/Unix is used to generate a sequence of numbers
    # For each PIN, print the password followed by the current PIN (e.g., "password 0001")
    echo "[redacted] $i"
done | nc localhost 30002
# Send all generated lines to the daemon listening on port 30002 using netcat (nc)
# This avoids reconnecting for each PIN attempt — the daemon stays connected for the whole brute-force process
bandit level 25-26#
For this challenge, we are provided with the private key for the bandit user 26 that we can use to log in to the user’s session, however, the shell is not /bin/bash shell. We can check which type of shell it is by looking at the /etc/passwd file, as shown below.
bandit2:x:11002:11002:bandit level 2:/home/bandit2:/bin/bash
bandit20:x:11020:11020:bandit level 20:/home/bandit20:/bin/bash
bandit21:x:11021:11021:bandit level 21:/home/bandit21:/bin/bash
bandit22:x:11022:11022:bandit level 22:/home/bandit22:/bin/bash
bandit23:x:11023:11023:bandit level 23:/home/bandit23:/bin/bash
bandit24:x:11024:11024:bandit level 24:/home/bandit24:/bin/bash
bandit25:x:11025:11025:bandit level 25:/home/bandit25:/bin/bash
bandit26:x:11026:11026:bandit level 26:/home/bandit26:/usr/bin/showtext => for this user the shell is of type /usr/bin/showtext
bandit27:x:11027:11027:bandit level 27:/home/bandit27:/bin/bash
bandit28:x:11028:11028:bandit level 28:/home/bandit28:/bin/bash
bandit29:x:11029:11029:bandit level 29:/home/bandit29:/bin/bash
We can check to find this is what type of shell as shown below
bandit25@bandit:~$ cat /usr/bin/showtext
#!/bin/sh

export TERM=linux

exec more ~/text.txt
exit 0
As seen above, this is a simple shell script that utilizes the more command. Looking at the man page of the more command, we get some interesting commands we can use as shown below.
       =
           Display current line number.

       /pattern
           Search for kth occurrence of regular expression. Defaults to 1.

       n
           Search for kth occurrence of last regular expression. Defaults to 1.

       !command or :!command
           Execute command in a subshell.

       v
           Start up an editor at current line. The editor is taken from the environment variable
           VISUAL if defined, or EDITOR if VISUAL is not defined, or defaults to vi(1) if neither
           VISUAL nor EDITOR is defined.
For us to activate the more command, we shall reduce the terminal size in order to be able to activate it by increasing the size of the terminal output by pressing the button ctrl + +as shown below.

Above is the initial terminal size.

Above the size of the terminal after increasing the terminal output size.
After getting the terminal to that size, we can then try to press the v button to get a text editor, in our case we get the vim editor. We can access the password for the level 26 by using the :e which in vim means edit letter then followed by the password file as shown below

After entering the above command then pressing enter, we get the password for level 26.
bandit level 26-27#
For this level, we shall use the terminal we got in the previous section.
Here we shall set the shell to be /bin/bash as shown below.

To access the bash shell, we can now just type :shell, and we get our bash shell, but I want to explore the vi editor hence, to execute commands, we shall use the prefix shown below.

In vi editor, the prefix :! is used in the execution of external shell commands, as seen above.
Moreover, the binary file bandit27-do performs the same task as the one in bandit level 19, therefore, we shall use it to get the password for bandit level 27.

bandit level 27-28#
For this level, we shall be using git. This part is quite easy as we are required to clone the repo and be able to access the password for the next level. We shall do this in a temporary directory.
Below is the command we shall use, after the command you will be prompted for a password, we shall use the password for the user bandit27 as we are told on the webpage.
GIT_SSH_COMMAND="ssh -p 2220" git clone ssh://bandit27-git@localhost/home/bandit27-git/repo
Below is the breakdown of what the command does.
 GIT_SSH_COMMAND="ssh -p 2220"

This sets an environment variable for the Git command.

It tells Git:

"When using SSH to connect, use the command ssh -p 2220 instead of the default SSH (which uses port 22)."

This is important because the Bandit SSH server listens on port 2220, not 22.

git clone ssh://bandit27-git@localhost/home/bandit27-git/repo

This tells Git to clone a repository using the SSH protocol.

bandit27-git@localhost means:

Connect as user bandit27-git to the local machine (because you're already on the Bandit server).

/home/bandit27-git/repo is the path to the Git repository on the server.

So what happens together?
Git uses the custom SSH command (ssh -p 2220) to:

Connect to localhost on port 2220

Authenticate as bandit27-git

Clone the Git repo from /home/bandit27-git/repo
The password is located in a README file inside the cloned repo.
bandit level 28-29#
For this level, we shall use the same tactics as in the previous level to get the password for the next level.
GIT_SSH_COMMAND="ssh -p 2220" git clone ssh://bandit28-git@localhost/home/bandit28-git/repo
However, looking at the contents of the README file, we do not have the password for the level as seen below.
bandit28@bandit:/tmp/28o/repo$ cat README.md
# Bandit Notes
Some notes for level29 of bandit.

## credentials

- username: bandit29
- password: xxxxxxxxxx
Looking at the logs of the branch, we get some interesting commit message as shown below.
bandit28@bandit:/tmp/28o/repo$ git log
commit 674690a00a0056ab96048f7317b9ec20c057c06b (HEAD -> master, origin/master, origin/HEAD)
Author: Morla Porla <morla@overthewire.org>
Date:   Thu Apr 10 14:23:19 2025 +0000

    fix info leak

commit fb0df1358b1ff146f581651a84bae622353a71c0
Author: Morla Porla <morla@overthewire.org>
Date:   Thu Apr 10 14:23:19 2025 +0000

    add missing data

commit a5fdc97aae2c6f0e6c1e722877a100f24bcaaa46
Author: Ben Dover <noone@overthewire.org>
Date:   Thu Apr 10 14:23:19 2025 +0000

    initial commit of README.md
We shall check out to the branch fb0df1358b1ff146f581651a84bae622353a71c0 and see which missing data was added.
bandit28@bandit:/tmp/28o/repo$ git checkout fb0df1358b1ff146f581651a84bae622353a71c0
Note: switching to 'fb0df1358b1ff146f581651a84bae622353a71c0'.

You are in 'detached HEAD' state. You can look around, make experimental
changes and commit them, and you can discard any commits you make in this
state without impacting any branches by switching back to a branch.

If you want to create a new branch to retain commits you create, you may
do so (now or later) by using -c with the switch command. Example:

  git switch -c <new-branch-name>

Or undo this operation with:

  git switch -

Turn off this advice by setting config variable advice.detachedHead to false

HEAD is now at fb0df13 add missing data
bandit28@bandit:/tmp/28o/repo$ git status
HEAD detached at fb0df13
nothing to commit, working tree clean
bandit28@bandit:/tmp/28o/repo$ cat README.md
# Bandit Notes
Some notes for level29 of bandit.

## credentials

- username: bandit29
- password: [redacted]
After switching to the commit and checking the README file, we get the password for level 29.
bandit level 29-30#
We shall clone the repo using the same syntax as the previous levels.
GIT_SSH_COMMAND="ssh -p 2220" git clone ssh://bandit29-git@localhost/home/bandit29-git/repo
After cloning the repo and checking at the logs, we find the following details.
commit 3b8b91fc3c48f1a19d05670fd45d3e3f2621fcfa (HEAD -> master, origin/master, origin/HEAD)
Author: Ben Dover <noone@overthewire.org>
Date:   Thu Apr 10 14:23:21 2025 +0000

    fix username

commit 8d2ffeb5e45f87d0abb028aa796e3ebb63c5579c
Author: Ben Dover <noone@overthewire.org>
Date:   Thu Apr 10 14:23:21 2025 +0000

    initial commit of README.md
Switching to the initial commit, the username was changed from 29 to 30 and the fix username commit was used to switch the username from 29 to 30.
We shall explore the remote branches and see if we will find some interesting branches as shown below.
bandit29@bandit:/tmp/30a/repo$ git branch -r
  origin/HEAD -> origin/master
  origin/dev
  origin/master
  origin/sploits-dev
We have some interesting dev branches, we can explore and see if we can find credentials for user bandit30.
Let’s switch to the dev branch and see what contents are there.
bandit29@bandit:/tmp/30a/repo/code$ cd ..
bandit29@bandit:/tmp/30a/repo$ ls
code  README.md
bandit29@bandit:/tmp/30a/repo$ cat README.md
# Bandit Notes
Some notes for bandit30 of bandit.

## credentials

- username: bandit30
- password: [REDACTED]
We have creds for user bandit30.
bandit level 30-31#
after cloning the repo, we shall explore it to see what details we shall get.
GIT_SSH_COMMAND="ssh -p 2220" git clone ssh://bandit30-git@localhost/home/bandit30-git/repo
We only have one commit in the repo, as shown below.
bandit30@bandit:/tmp/31a/repo$ git log
commit fb05775f973256dc6d8d5bb6a8e6b96b0d8795c8 (HEAD -> master, origin/master, origin/HEAD)
Author: Ben Dover <noone@overthewire.org>
Date:   Thu Apr 10 14:23:24 2025 +0000

    initial commit of README.md
We have two branches as seen below.
bandit30@bandit:/tmp/31a/repo$ git branch -r
  origin/HEAD -> origin/master
  origin/master
Switching between the branches, we get no useful details on the README file but just the following text.
bandit30@bandit:/tmp/31a/repo$ cat README.md
just an epmty file... muahaha
We can use the command git show to display detailed information about the commit, and git tag to view if we can find some interesting labels used to mark specific commits.
bandit30@bandit:/tmp/31a/repo$ git show
commit fb05775f973256dc6d8d5bb6a8e6b96b0d8795c8 (HEAD -> master, origin/master, origin/HEAD)
Author: Ben Dover <noone@overthewire.org>
Date:   Thu Apr 10 14:23:24 2025 +0000

    initial commit of README.md

diff --git a/README.md b/README.md
new file mode 100644
index 0000000..029ba42
--- /dev/null
+++ b/README.md
@@ -0,0 +1 @@
+just an epmty file... muahaha
bandit30@bandit:/tmp/31a/repo$ git tag
secret
bandit30@bandit:/tmp/31a/repo$
As seen above, the git tag command has some interesting tag secret , we can use the git show command to view what the secret is as shown below.
bandit30@bandit:/tmp/31a/repo$ git show secret
[REDACTED]
bandit30@bandit:/tmp/31a/repo$
The string that was displayed was the password for bandit31, that is after I tried to log in to the user using the string.
bandit level 31-32#
For this challenge, we are required to push a file named key.txt to the remote server as indicated in the README file.
bandit31@bandit:/tmp/32a/repo$ cat README.md
This time your task is to push a file to the remote repository.

Details:
    File name: key.txt
    Content: 'May I come in?'
    Branch: master
Furthermore, we are also given the content to include in the file as May I come in?
After creating the file and pushing it to the remote branch, we get the password in the push output as shown below.
bandit31@bandit:/tmp/32a/repo$ echo "May I come in?" > key.txt
bandit31@bandit:/tmp/32a/repo$ ls
key.txt  README.md
bandit31@bandit:/tmp/32a/repo$ git add key.txt
The following paths are ignored by one of your .gitignore files:
key.txt
hint: Use -f if you really want to add them.
hint: Turn this message off by running
hint: "git config advice.addIgnoredFile false"
bandit31@bandit:/tmp/32a/repo$ git add -f key.txt
bandit31@bandit:/tmp/32a/repo$ git commit -m key.txt
[master 1692a26] key.txt
 1 file changed, 1 insertion(+)
 create mode 100644 key.txt
bandit31@bandit:/tmp/32a/repo$ git push origin master
The authenticity of host 'localhost (127.0.0.1)' can't be established.
ED25519 key fingerprint is SHA256:C2ihUBV7ihnV1wUXRb4RrEcLfXC5CXlhmAAM/urerLY.
This key is not known by any other names.
Are you sure you want to continue connecting (yes/no/[fingerprint])? yes
Could not create directory '/home/bandit31/.ssh' (Permission denied).
Failed to add the host to the list of known hosts (/home/bandit31/.ssh/known_hosts).

                      This is an OverTheWire game server.
            More information on http://www.overthewire.org/wargames

!!! You are trying to log into this SSH server on port 22, which is not intended.

bandit31-git@localhost: Permission denied (publickey).
fatal: Could not read from remote repository.

Please make sure you have the correct access rights
and the repository exists.
bandit31@bandit:/tmp/32a/repo$ GIT_SSH_COMMAND="ssh -p 2220" git push origin master
The authenticity of host '[localhost]:2220 ([127.0.0.1]:2220)' can't be established.
ED25519 key fingerprint is SHA256:C2ihUBV7ihnV1wUXRb4RrEcLfXC5CXlhmAAM/urerLY.
This key is not known by any other names.
Are you sure you want to continue connecting (yes/no/[fingerprint])? yes
Could not create directory '/home/bandit31/.ssh' (Permission denied).
Failed to add the host to the list of known hosts (/home/bandit31/.ssh/known_hosts).
                         _                     _ _ _
                        | |__   __ _ _ __   __| (_) |_
                        | '_ \ / _` | '_ \ / _` | | __|
                        | |_) | (_| | | | | (_| | | |_
                        |_.__/ \__,_|_| |_|\__,_|_|\__|

                      This is an OverTheWire game server.
            More information on http://www.overthewire.org/wargames

bandit31-git@localhost's password:
Enumerating objects: 4, done.
Counting objects: 100% (4/4), done.
Delta compression using up to 2 threads
Compressing objects: 100% (2/2), done.
Writing objects: 100% (3/3), 322 bytes | 322.00 KiB/s, done.
Total 3 (delta 0), reused 0 (delta 0), pack-reused 0
remote: ### Attempting to validate files... ####
remote:
remote: .oOo.oOo.oOo.oOo.oOo.oOo.oOo.oOo.oOo.oOo.
remote:
remote: Well done! Here is the password for the next level:
remote: [REDACTED]
remote:
remote: .oOo.oOo.oOo.oOo.oOo.oOo.oOo.oOo.oOo.oOo.
remote:
To ssh://localhost/home/bandit31-git/repo
 ! [remote rejected] master -> master (pre-receive hook declined)
error: failed to push some refs to 'ssh://localhost/home/bandit31-git/repo'
bandit level 32-33#
For this section, we get a different challenge. We are back again at shell escaping as in the levels 25-27.
I tried a few commands in uppercase and lowercase but got nothing as shown below.
he following locations:

    * gef (https://github.com/hugsy/gef) in /opt/gef/
    * pwndbg (https://github.com/pwndbg/pwndbg) in /opt/pwndbg/
    * gdbinit (https://github.com/gdbinit/Gdbinit) in /opt/gdbinit/
    * pwntools (https://github.com/Gallopsled/pwntools)
    * radare2 (http://www.radare.org/)

--[ More information ]--

  For more information regarding individual wargames, visit
  http://www.overthewire.org/wargames/

  For support, questions or comments, contact us on discord or IRC.

  Enjoy your stay!

WELCOME TO THE UPPERCASE SHELL
>> help
sh: 1: HELP: Permission denied
>> HELP
sh: 1: HELP: Permission denied
>> LS
sh: 1: LS: Permission denied
>>
There’s a possibility that this shell is actually a script being executed through another shell. If that’s the case, we might be able at least in theory to invoke that shell using the special variable $0. You can read more about what $0 does here. Even if the shell automatically converts input to uppercase (as in our special UPPERCASE SHELL), $0 would remain unchanged. So, let’s try using it:
sh: 1: HELP: Permission denied
>> HELP
sh: 1: HELP: Permission denied
>> LS
sh: 1: LS: Permission denied
>> $0
$ ls
uppershell
$ pwd
/home/bandit32
$ ls -la
total 36
drwxr-xr-x  2 root     root      4096 Apr 10 14:23 .
drwxr-xr-x 70 root     root      4096 Apr 10 14:24 ..
-rw-r--r--  1 root     root       220 Mar 31  2024 .bash_logout
-rw-r--r--  1 root     root      3771 Mar 31  2024 .bashrc
-rw-r--r--  1 root     root       807 Mar 31  2024 .profile
-rwsr-x---  1 bandit33 bandit32 15140 Apr 10 14:23 uppershell
$
We now have a shell, we can try to get the password for level 33 by concatenating the contents of the file /etc/bandit_pass/bandit33.
$ cat /etc/bandit_pass/bandit33
[REDACTED]
$
bandit level 33-34#
We are finally done with the challenges.
bandit33@bandit:~$ ls
README.txt
bandit33@bandit:~$ cat README.txt
Congratulations on solving the last level of this game!

At this moment, there are no more levels to play in this game. However, we are constantly working
on new levels and will most likely expand this game with more levels soon.
Keep an eye out for an announcement on our usual communication channels!
In the meantime, you could play some of our other wargames.

If you have an idea for an awesome new level, please let us know!
bandit33@bandit:~$
😉Till next time guys :)